Configuration files
Managing configurations
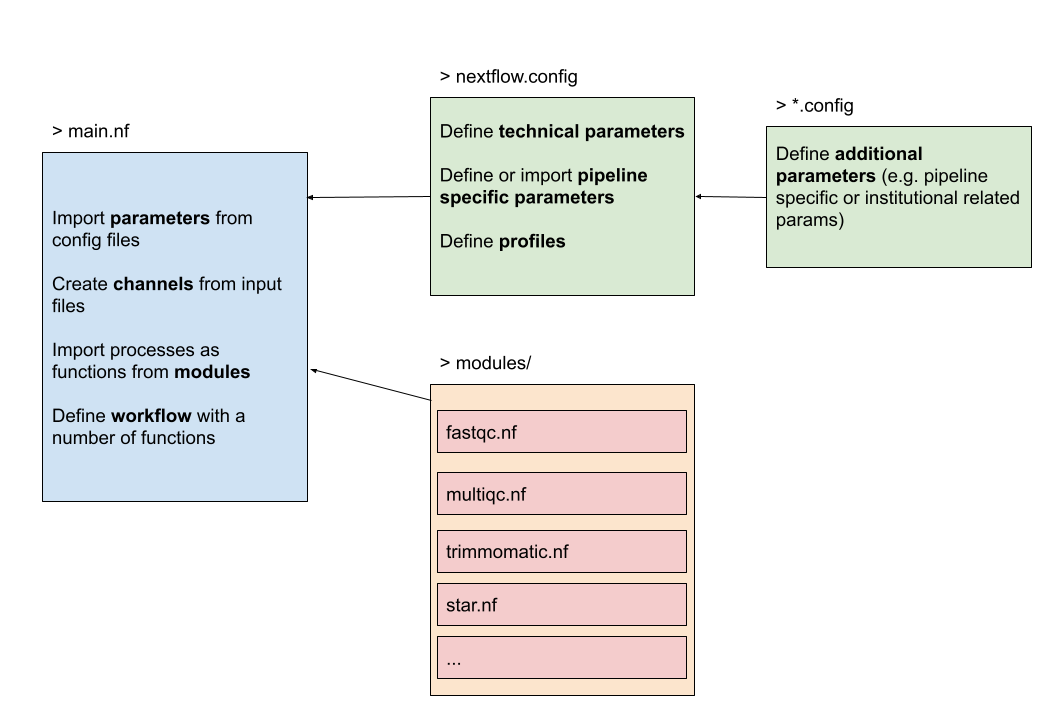
Pipeline configuration properties are defined in a file named nextflow.config situated in the pipeline execution directory. This file can be used to define technical and project depeding parameters, e.g. which executor to use, the processes’ environment variables, pipeline parameters etc. Hence, the configuration file allows to separate these variables from the nextflow workflow script and makes the scripts more flexible and modular.
Let’s have a look again at the structure of the workflow. The nextflow.config defines the technical and pipeline specific parameters and are imported in the main.nf script. Actually, we can write any number of *.config file and import it in the general nextflow.config which is imported by default in the main.nf.
Technical parameters
Executors
While a process defines what command or script has to be executed, the executor determines how that script is actually run on the target system. In the Nextflow framework architecture, the executor is the component that determines the system where a pipeline process is run and it supervises its execution.
If not otherwise specified, processes are executed on the local computer using the local executor. In the example below we start with defining the processes’ allowed memory- and cpu-usage. This list can be further extended with parameters like time, queue, etc.
process {
    memory='1G'
    cpus='1'
}
It’s also possible to create labels that can be chosen and used for each process separately. In the example below we can use the label high as a directive in a process and hence allow more resources for that particular process (see star.nf). These labels are added in the directives of the processes as we did in our modules.
process {
    withLabel: 'low' {
        memory='1G'
        cpus='1'
        time='6h'
    }
    withLabel: 'med' {
        memory='2G'
        cpus='2'
    }
    withLabel: 'high' {
        memory = '8G'
        cpus='8'
    }
}
The local executor is very useful for pipeline development and testing purposes, but for real world computational pipelines an HPC or cloud platform is often required. The executor can be defined as process.executor = 'local' in the snippet above. If we want to use a different executor we could use e.g. azurebatch or awsbatch, however this goes also hand in hand with the parameters that are applicable for that specific executor. This config file contains the minimal set of required parameters for the Azure case (we will discuss the profiles soon).
Hence, you can write your pipeline script once and have it running on your computer, a cluster resource manager or the cloud by simply changing the executor definition in the Nextflow configuration file. As these configurations are often a one-time effort, managed by a local IT/admin person, we refer to the official documentation.
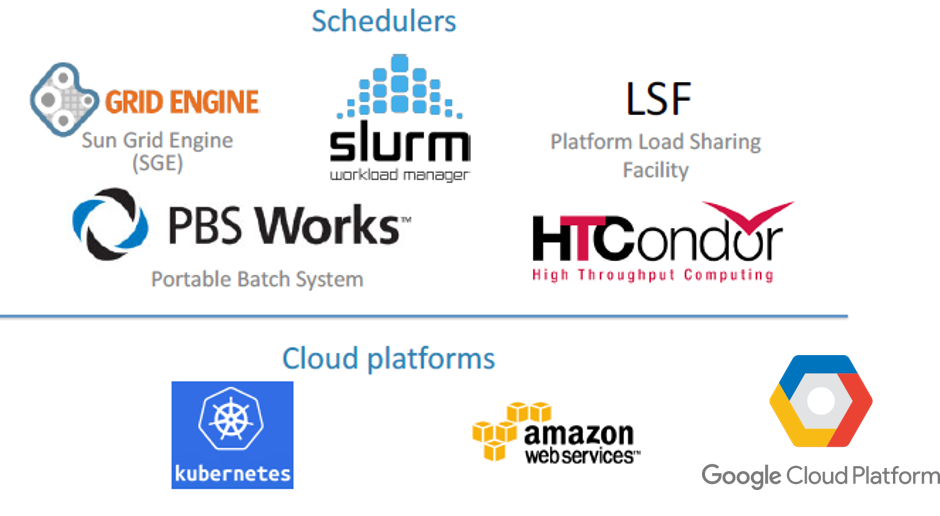
Here is an overview of supported executors:
Portability
As discussed before, Nextflow is especially useful thanks to its portability and reproducibility, i.e. the native support for containers and environment managers. There are two options for attaching containers to your pipeline. Either you define a dedicated container image for each process individually, or you define one container for all processes together in the configurations file.
In the former case, simply define the container image name in the process directives. In the snippet below, we defined a container that already exists in DockerHub. Dockerhub is also the default location where Nextflow will search for the existence of this container if it doesn’t exist locally.
process quality-control {
    container 'biocontainers/fastqc:v0.11.9_cv7'

    """
    fastqc ...
    """
}
In the latter case, write the following line in the nextflow.config file:
process.container = 'vibbioinfocore/analysispipeline:latest'
We’re referring to a Docker container image that exists on Dockerhub. Notice however that all the tools and dependencies necessary during your pipeline, need to be present in this image. To run the pipeline script with this Docker container image, use the following command: nextflow run example.nf -with-docker.
Ultimately, the parameter -with-docker does not need to be defined on runtime and it should use the Docker container in the background at all times, for this purpose we can set docker.enabled = true option in the config file.
Note
Another interesting parameter to consider adding to the configuration file is the docker.runOptions = '-u \$(id -u):\$(id -g)'. This allows us to create files with permissions on user-level instead of the default root-level files.
Singularity:
Similarly with a singularity image for which you do not have to adapt the pipeline script. You can run with Singularity container using the following command-line parameter: -with-singularity [singularity-image-file], where the image is downloaded from Dockerhub as well, built on runtime and then stored in a folder singularity/. Re-using a singularity image is possible with:
singularity.cacheDir = "/path/to/singularity"
If you want to avoid entering the Singularity image as a command line parameter, you can define it in the Nextflow configuration file. For example you can add the following lines in the nextflow.config file:
process.container = 'singularity.img'
singularity.enabled = true
Profiles
To create some structure in the config files and quickly select the parameters necessary for the infrastructure we are running the workflow on, the concept of profiles was introduced. Each profile contains a bunch of parameters and is selected on runtime using the -profile parameter.
Combining all of the above results in one nice looking config file:
profiles {
    standard {
        process {
            executor = 'local'
            withLabel: 'low' {
                memory='1G'
                cpus='1'
                time='6h'
            }
            withLabel: 'med' {
                memory='2G'
                cpus='2'
            }
            withLabel: 'high' {
                memory = '8G'
                cpus='8'
            }
        }
    }

    azure {
        process {
            executor = 'azurebatch'
        }
    }

    conda { params.enable_conda = true }

    docker {
        // Enabling docker
        docker.enabled = true
        docker.runOptions = '-u \$(id -u):\$(id -g)'
    }

    singularity {
        // Enabling singularity
        singularity.enabled = true
        singularity.autoMounts = true
        singularity.cacheDir = "$launchDir/singularity"
    }
}
Here are some examples of how we can run the workflow:
Locally with conda:
nextflow run main.nf -profile standard,conda
Locally with docker:
nextflow run main.nf -profile standard,docker
On Microsoft Azure with Docker:
nextflow run main.nf -profile azure,docker
Pipeline parameters
Imagine that you want to separate analysis parameters in a separate file, this is possible by creating a params.config file and include it in the nextflow.config file as such:
includeConfig "/path/to/params.config"
The parameters can be defined with params.<name> = <value> or join them all in one long list as such:
// Define project parameters needed for running the pipeline
params {
    // General parameters
    projdir = "/path/to/data"
    refdir = "/path/to/references"
    outdir = "/path/to/data-analysis"

    // Reference genome and annotation files
    genome = "${refdir}/Drosophila_melanogaster.BDGP6.dna.fa"
    gtf = "${refdir}/Drosophila_melanogaster.BDGP6.85.sample.gtf"

    // Input parameters
    reads = "${projdir}/*{1,2}.fq.gz"

    ...
}
Extra exercises
Complete the nextflow.config and params.config files. These config files should accompany the script RNAseq.nf. The commmand to run this pipeline should be: nextflow run RNAseq.nf -profile docker.
The solution is available in the folder with exercises of the next chapter 05_reports.
Run the nextflow-io/rnaseq-nf locally with Docker.
nextflow run nextflow-io/rnaseq-nf -profile standard,docker
The local executor will be chosen and it is hence not necessary to select the standard profile.
In the previous extra exercise we ran a Nextflow pipeline residing on GitHub. Imagine that we want to run this pipeline, however we need to do some minor configurations to it. Let’s say that we want to change the docker profile. Find a way to edit the nextflow.config file and change the contents of docker profile so it includes the following:
...
    docker.enabled = true
    docker.runOptions = '-u \$(id -u):\$(id -g)'
To change anything in the configuration file, the nextflow.config file needs to be edited. There are two options for this: in the assets where the pipeline is stored or by cloning the pipeline in our local folder structure. For this, you can use the following command: nextflow clone <pipeline-name> to clone (download) the pipeline locally. Then, open an editor and change the nextflow.config file so it contains the following:
Warning
Watch out with nested git folders!
profiles {
    docker {
        docker.enabled = true
        docker.runOptions = '-u \$(id -u):\$(id -g)'
    }
}